Pizza crust
These days, the children are clamoring to eat pizza every day, and it just so happens that the children have a few days off on National Day, so they don’t have to go to school, so I can make time to make some for them, so that they can have a good time and have a good time! If you don’t have time, you can make the pizza crust in advance, put it in the refrigerator to freeze, take it out to thaw when you make it, and put the pizza ingredients directly on it, which can save a lot of time!
How to make pizza crust

Step 1
Add yeast, sugar and a little salt to the flour and mix well!

Step 2
Add the right amount of milk and knead into a smooth dough!

Step 3
Add an appropriate amount of hot water to the pot, put the dough on the steamer together with the basin, cover and ferment for about 30 minutes (the weather is cold, this method is very fast to ferment the noodles)! If it’s summer, don’t use it, just ferment at room temperature!

Step 4
The fermented dough is twice the size of the original, poke it with your finger, the entrance of the finger hole is smooth, and the dough in the hole does not bounce back, that is, it is the first fermentation. After the first fermentation is completed, press the dough repeatedly with your fist to expel the gas, then take out the dough and put it on the chopping board and knead it a few times, then let it stand for about 15 minutes, let the dough relax a little, so that the yeast can regain its strength, and then divide the dough evenly into the number of pizzas you want to prepare, mine is a 10-inch pizza, then knead the dough smoothly, put it in a basin, and cover the dough with a lid. Carry out the second fermentation, about 30 minutes, half a shot is enough!

Step 5
After the fermentation is completed, knead the dough repeatedly with your fist to exhaust, and then let the dough relax for about 15 minutes. Put the kneaded dough on the pizza plate, slowly press down and push out in the middle with your fingers, the bottom of the cake should not be too thin, the thickness should be uniform, otherwise the bottom is easy to bake dry paste when baking, but the surroundings are not yet baked. (I use a French baker non-stick pizza plate, so put the dough directly on the crust and press the crust, if it is not a non-stick pizza plate, brush a layer of cooking oil in the plate to prevent it from sticking to the pizza plate!) )

Step 6
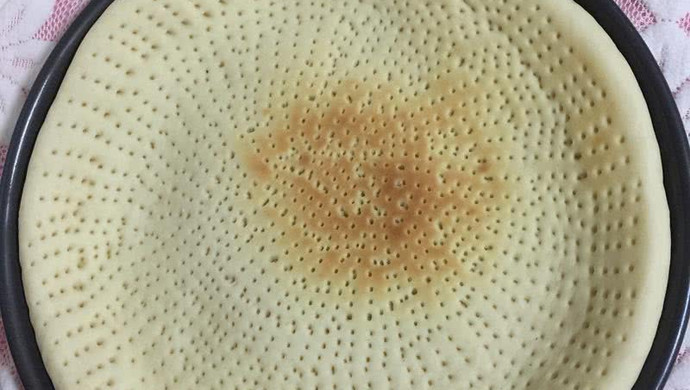
Use a fork to insert small holes evenly into the crust! The pizza made with such a crust is more flavorful!

Step 7
Put the pizza plate on the grill in the microwave, press the “steamed egg” button, it is exactly 150 degrees for 12 minutes, and the last few minutes must guard the microwave for fear of overbaking, so that it will be very fragrant, and bake until the crust is a little hard. If you don’t use the finished pizza crust, you can seal it with plastic wrap or a plastic bag, put it in the freezer, take it out the next time you want to use it, put the pizza toppings on it and put it directly in the microwave.
Cooking tips for pizza crust